Configuration Guide
Once logged in as an Administrator, you have full control over the platform via the Dashboard. The interface is designed to be intuitive and divided into functional cards.
1. General Settings & Branding
Located in the "Quick Configuration" section.
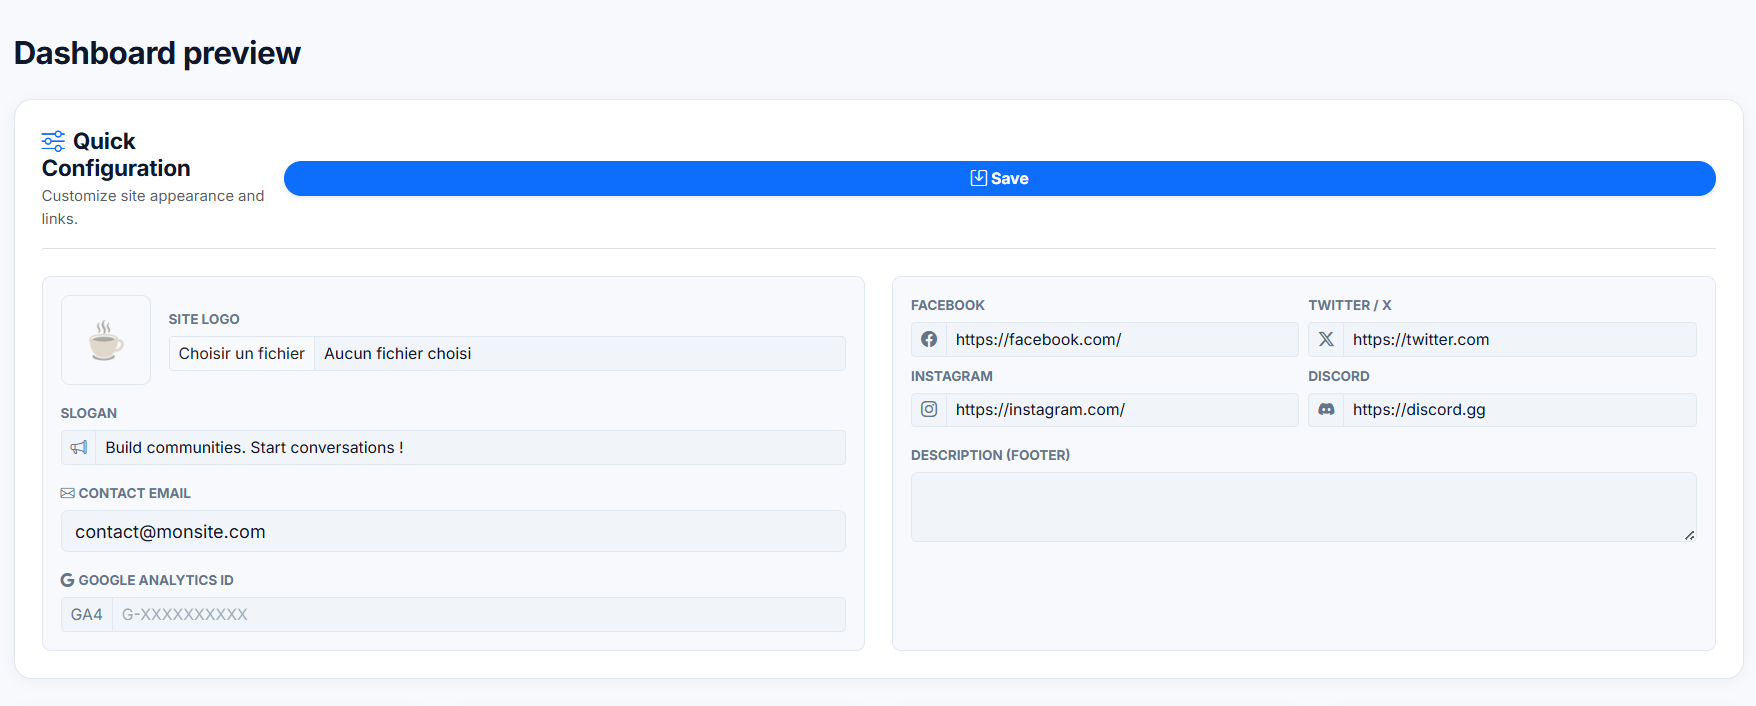
This is where you define your site's identity.
- Site Logo: Upload your community logo here.
- Recommendation: Use a transparent PNG or SVG for best results.
- Slogan: This text appears in the browser tab and search engine results.
- Contact Email: The email address displayed in the footer and contact page.
- Google Analytics ID: Paste your GA4 Measurement ID (starts with
G-XXXXXX) to track visitor statistics. - Social Links: Add your full URLs for Facebook, Twitter/X, Instagram, and Discord. Leave empty to hide the icon.
- Footer Description: A short "About Us" text displayed at the bottom of every page.
!!! tip "Don't forget to Save" Click the large blue Save button at the top after making changes.
2. Homepage Layout (The Switcher)
Located in the "Home" card.
This is the most powerful feature of the script. With a single click, you can transform your website's identity to fit your community's needs.
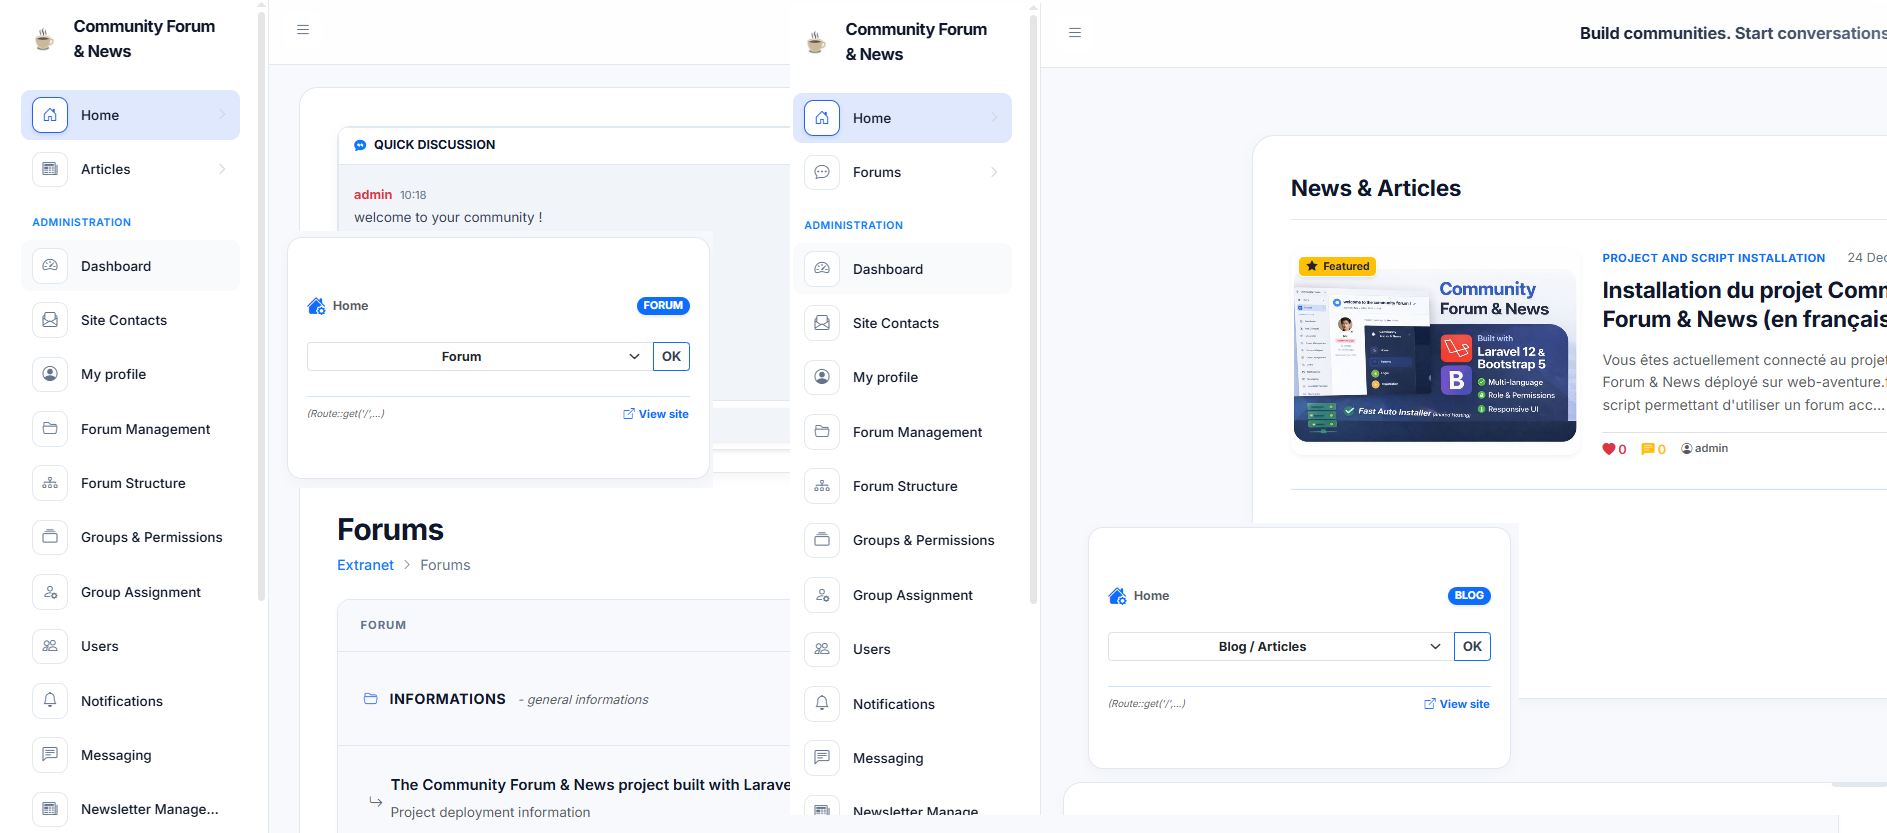
Two Modes, One Click:
- Left Side (Forum Mode): The homepage focuses on categories, latest discussions, and community statistics. Ideal for support forums or gaming communities.
- Right Side (Blog Mode): The homepage highlights your articles with a featured slider and news grids. The forum remains accessible via the menu. Ideal for content creators and news portals.
How to switch:
- On the Dashboard, find the Home card (as shown in the center of the image).
- Select Blog / Articles or Forum.
- Click OK.
- The change is instant (No code modification required).
3. Email & Security
Located in the "Email Configuration & Security" section.
Reliable email delivery is essential for user activation and notifications.
While you configured the basics during installation, you can update these settings at any time directly from the Dashboard, without needing to edit the .env file via FTP.
1. Edit SMTP Settings
Click the Edit Config button (gear icon) to open the configuration modal.
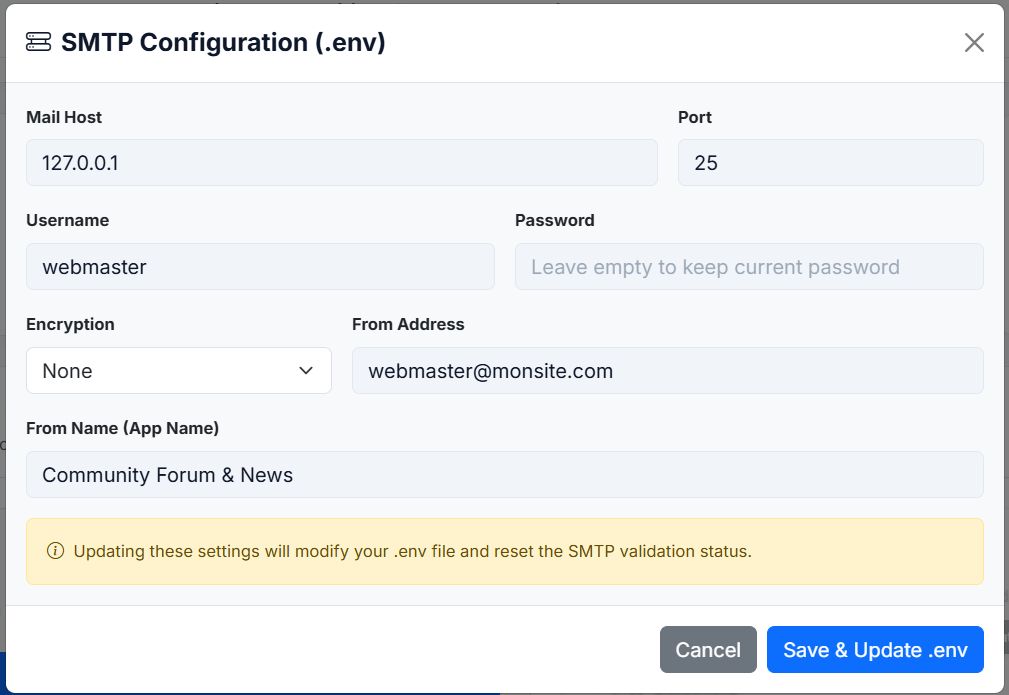
- Live Update: Enter your new credentials (Host, Port, User, Password).
- Secure: When you click Save, the system securely updates your
.envfile and automatically clears the application cache. - Password: Leave the password field empty if you only want to change the other settings (e.g., the "From Name").
!!! warning "Validation Reset" Changing these settings will reset the "SMTP Validated" status. You will need to run the Technical Test again (Step 2) to confirm the new credentials work.
2. Technical Test
Once your settings are saved, you must verify them. 1. Click "Send test code". 2. Check your admin email inbox. 3. Enter the code received to validate the connection.
4. Social Login (OAuth)
Located in the "Social Network API Keys" section.
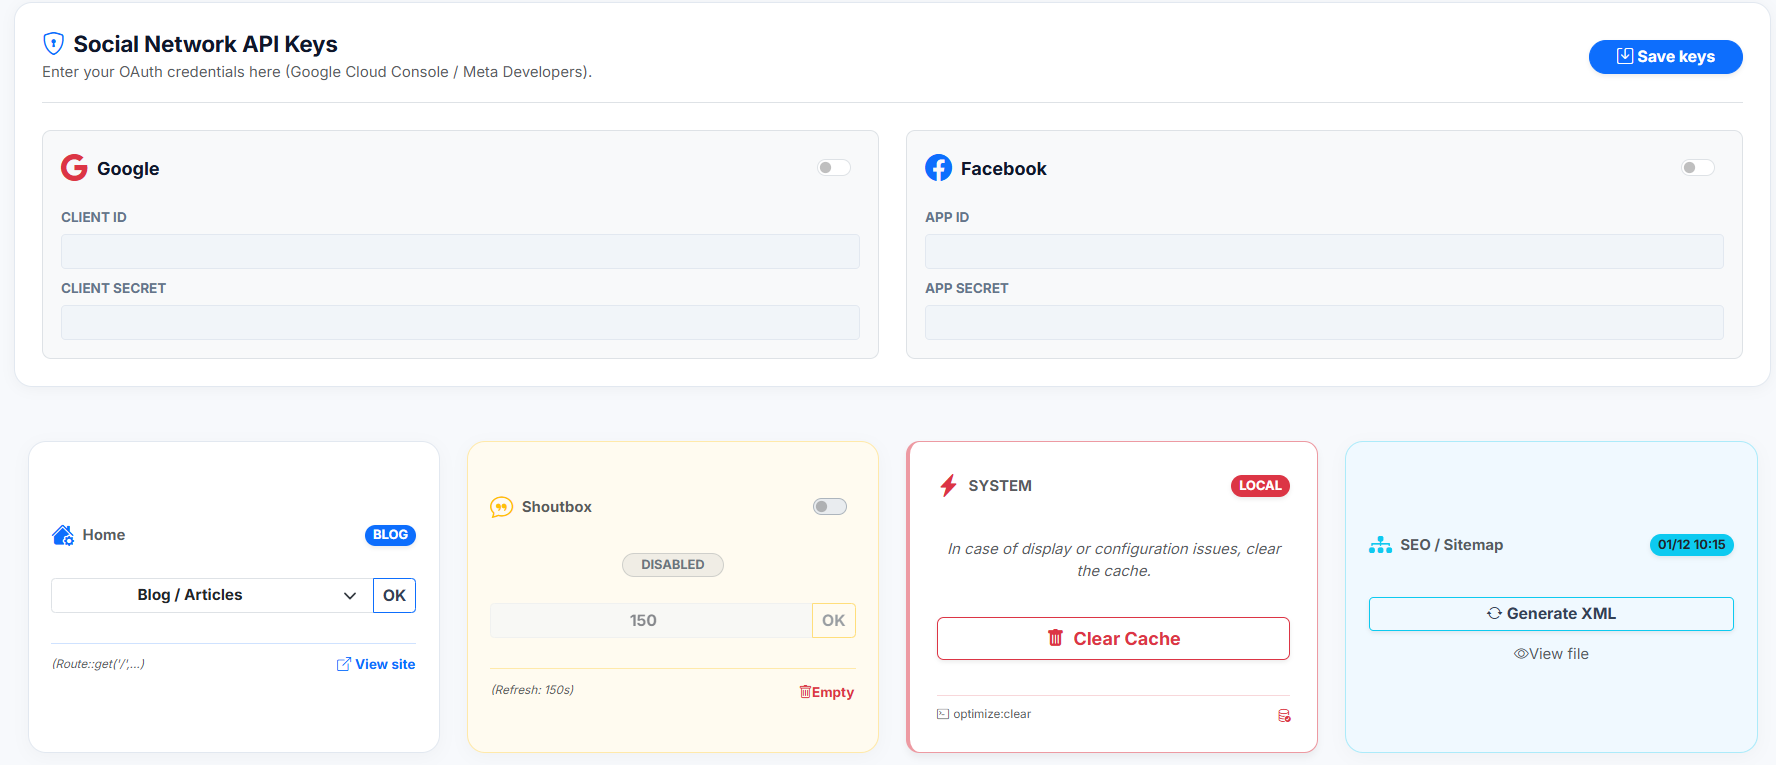
Allow users to sign up in 1 click using their Google or Facebook accounts.
- Google:
- Get your credentials from the Google Cloud Console.
- Enter the Client ID and Client Secret.
- Toggle the switch to ON.
- Facebook:
- Get your credentials from Meta for Developers.
- Enter the App ID and App Secret.
- Toggle the switch to ON.
- Click Save keys.
5. System Utilities
SEO / Sitemap
Located in the "SEO / Sitemap" card.
To help Google index your forum and articles:
1. Click Generate XML.
2. The system will update the sitemap.xml file at the root of your domain.
3. You can verify it by clicking View file.
System Cache
Located in the "System" card.
If you make changes to the .env file or if you encounter display issues:
1. Click Clear Cache.
2. This executes the Laravel command optimize:clear to flush the config, route, and view cache.
Shoutbox Settings
Located in the "Shoutbox" card. If you use the live chat widget (Shoutbox): * Toggle: Enable or disable the widget globally. * Refresh Rate: Set the auto-refresh interval (e.g., 150 seconds). * Empty: Click the trash icon to delete all chat messages.
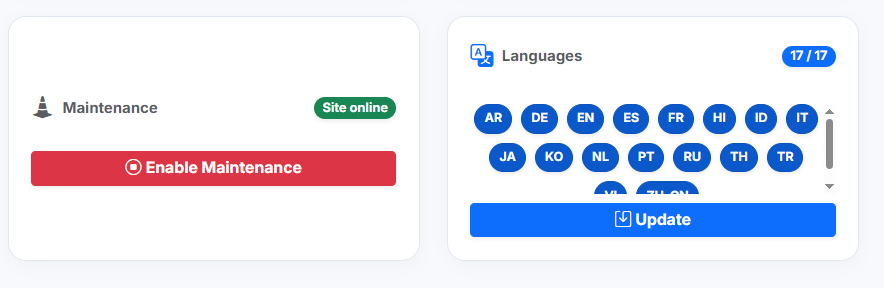
6. Site Maintenance & Languages
Maintenance Mode
If you need to perform work on the site: 1. Click Enable Maintenance. 2. The site will show a "Coming Soon / Under Construction" page to visitors. 3. Note: Administrators can still access the site while maintenance is active.
Languages
The script supports multiple languages. 1. Select the active languages for your community (e.g., EN, FR, ES). 2. Click Update. 3. Selected languages will appear in the footer for users to choose.