Administration Manual
The dashboard sidebar is organized into logical groups. Since the interface is intuitive, this guide focuses on the logic behind the features rather than explaining every button.
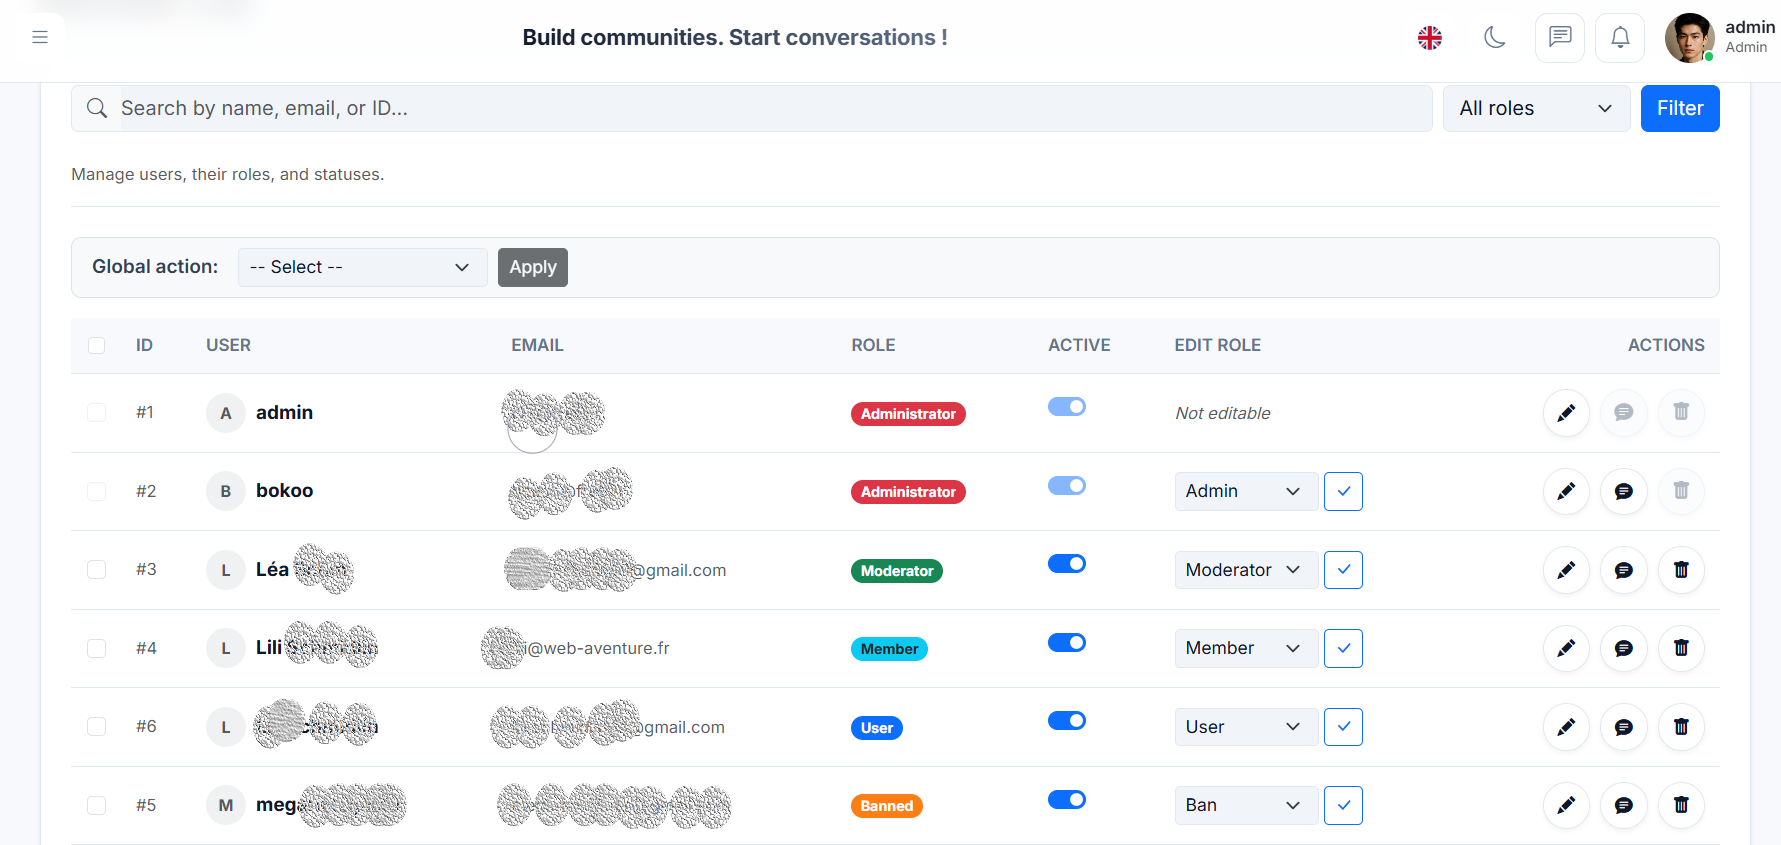
User Management (Data Grid)
Managing thousands of users requires a powerful interface. We designed a clean, searchable, and actionable Data Grid.
-
Smart Search & Filters: Find any user instantly by searching for their Name, Email, or ID. You can also filter the list by Role (e.g., "Show me all Moderators").
-
Inline Quick Actions: Save time by performing actions directly from the list:
- Change Role: Promote a user from Member to Moderator instantly using the dropdown.
- Quick Ban: Toggle the "Active" switch to disable an account immediately.
- Direct Message: Click the chat bubble icon to send a private message to the user.
-
Bulk Actions: Select multiple users using the checkboxes on the left to perform "Global Actions" (like deleting multiple spam accounts at once).
!!! danger "Safety Lock" As seen in the screenshot (User #1), the system prevents the main Super Administrator from accidentally deleting their own account or changing their own role.
### Group Management (Badges)
Groups are different from Roles. While a user has only one primary Role (e.g., Administrator), they can belong to multiple Groups (e.g., "VIP", "Donors", "Beta Testers").
1. Creating a Group
Give your members a unique identity with custom badges.
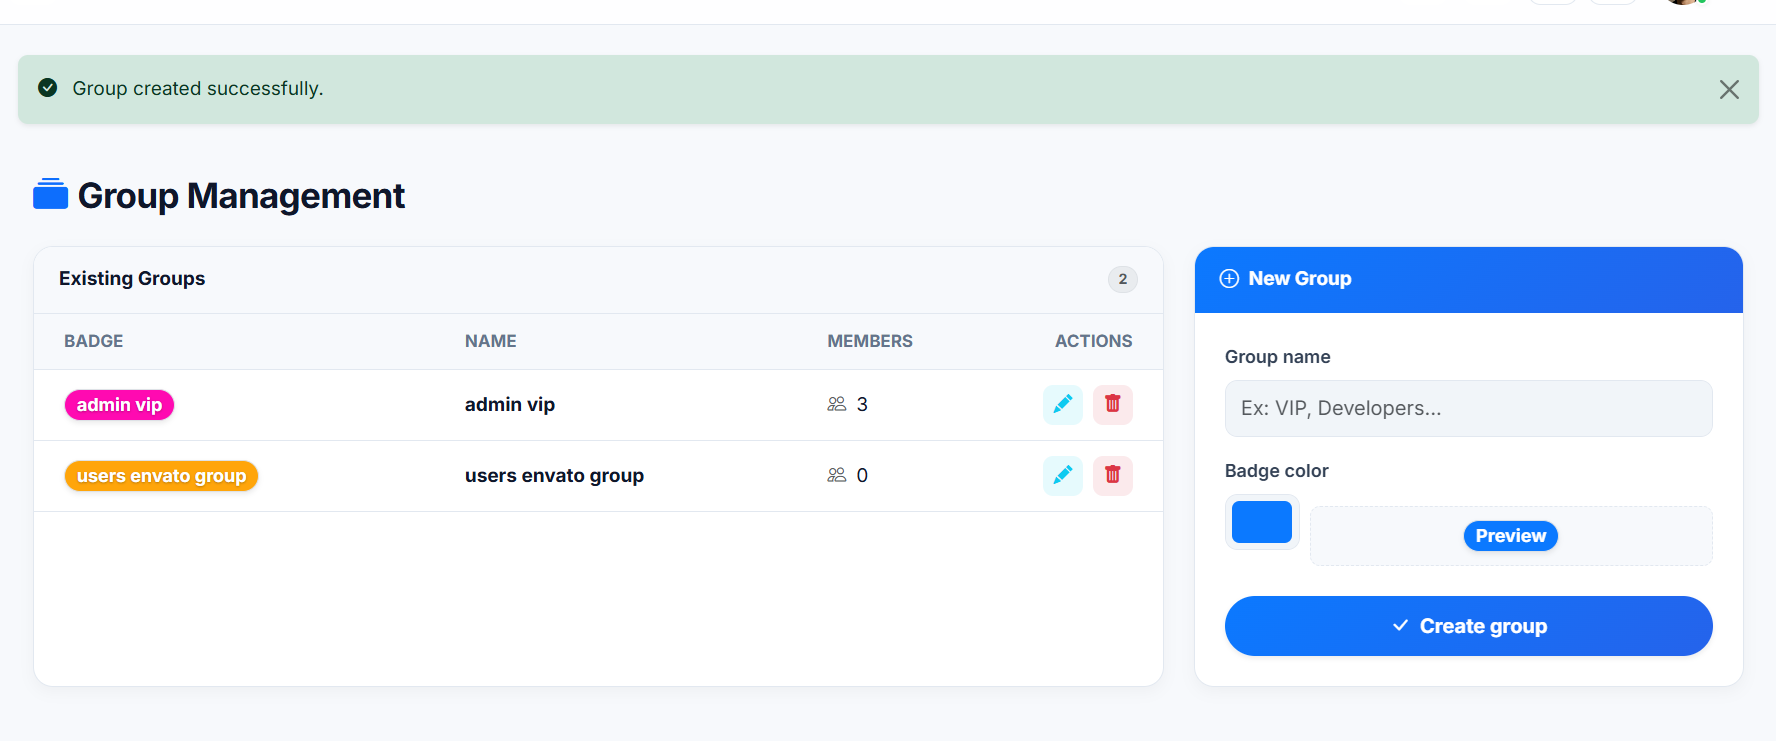
- Visual Badge Creator: Simply type a name and pick a color using the color picker.
- Live Preview: You can see exactly how the badge will look on the forum before creating it.
- Member Count: The list shows you instantly how many users belong to each group.
2. Mass Assignment (Bulk Actions)
We know that managing a community involves repetitive tasks. That's why we built a Bulk Action System.
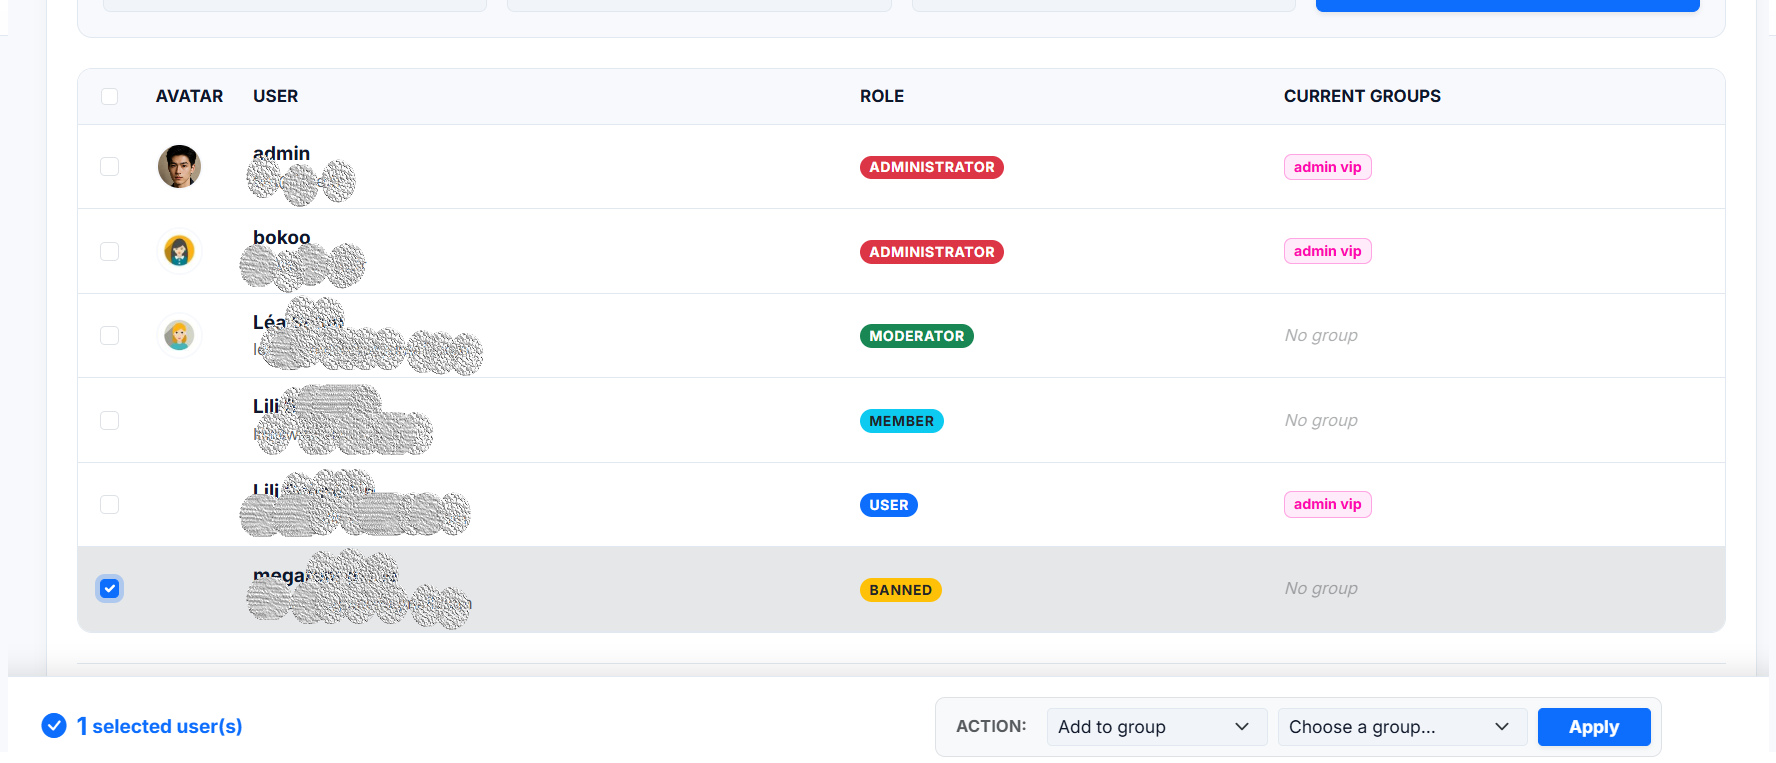
How to add users to a group in seconds: 1. Select: Check the boxes next to the users you want to modify (left column). 2. Action Bar: A floating action bar will appear at the bottom of the screen. 3. Choose Action: Select "Add to group" (or "Remove from group"). 4. Target: Choose the destination group (e.g., "admin vip"). 5. Apply: Click the blue button.
!!! tip "Efficiency" You can select 10, 20, or 50 users and add them all to the "VIP" group in a single click. No need to open each profile individually!
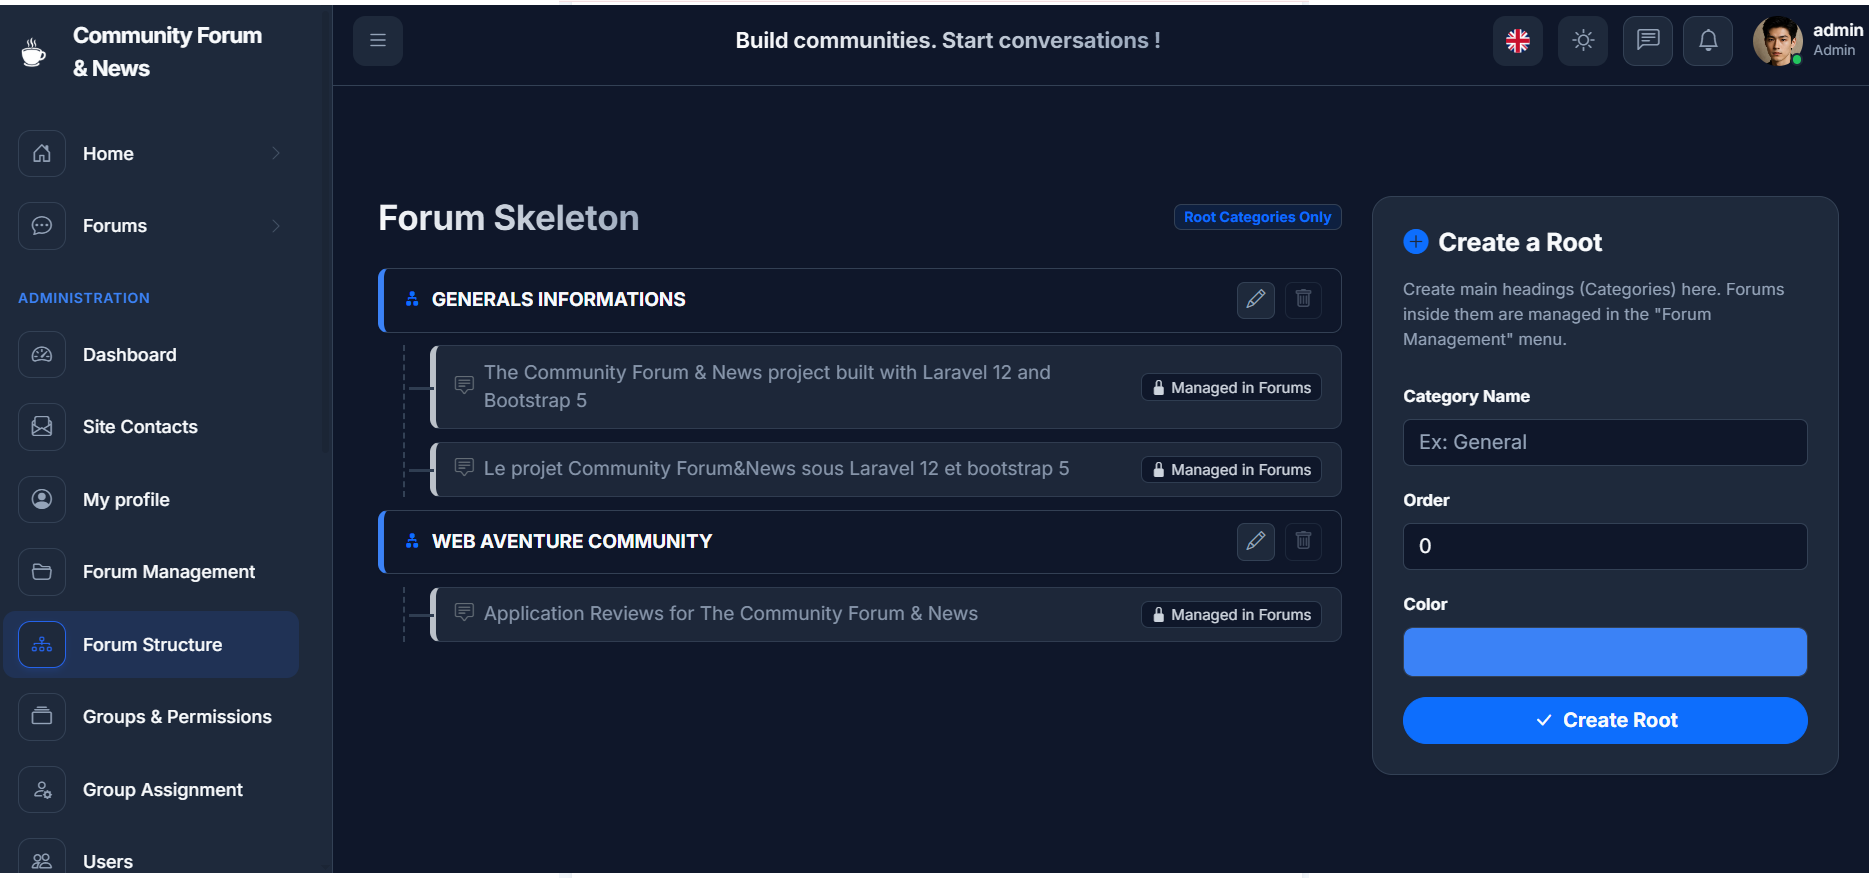
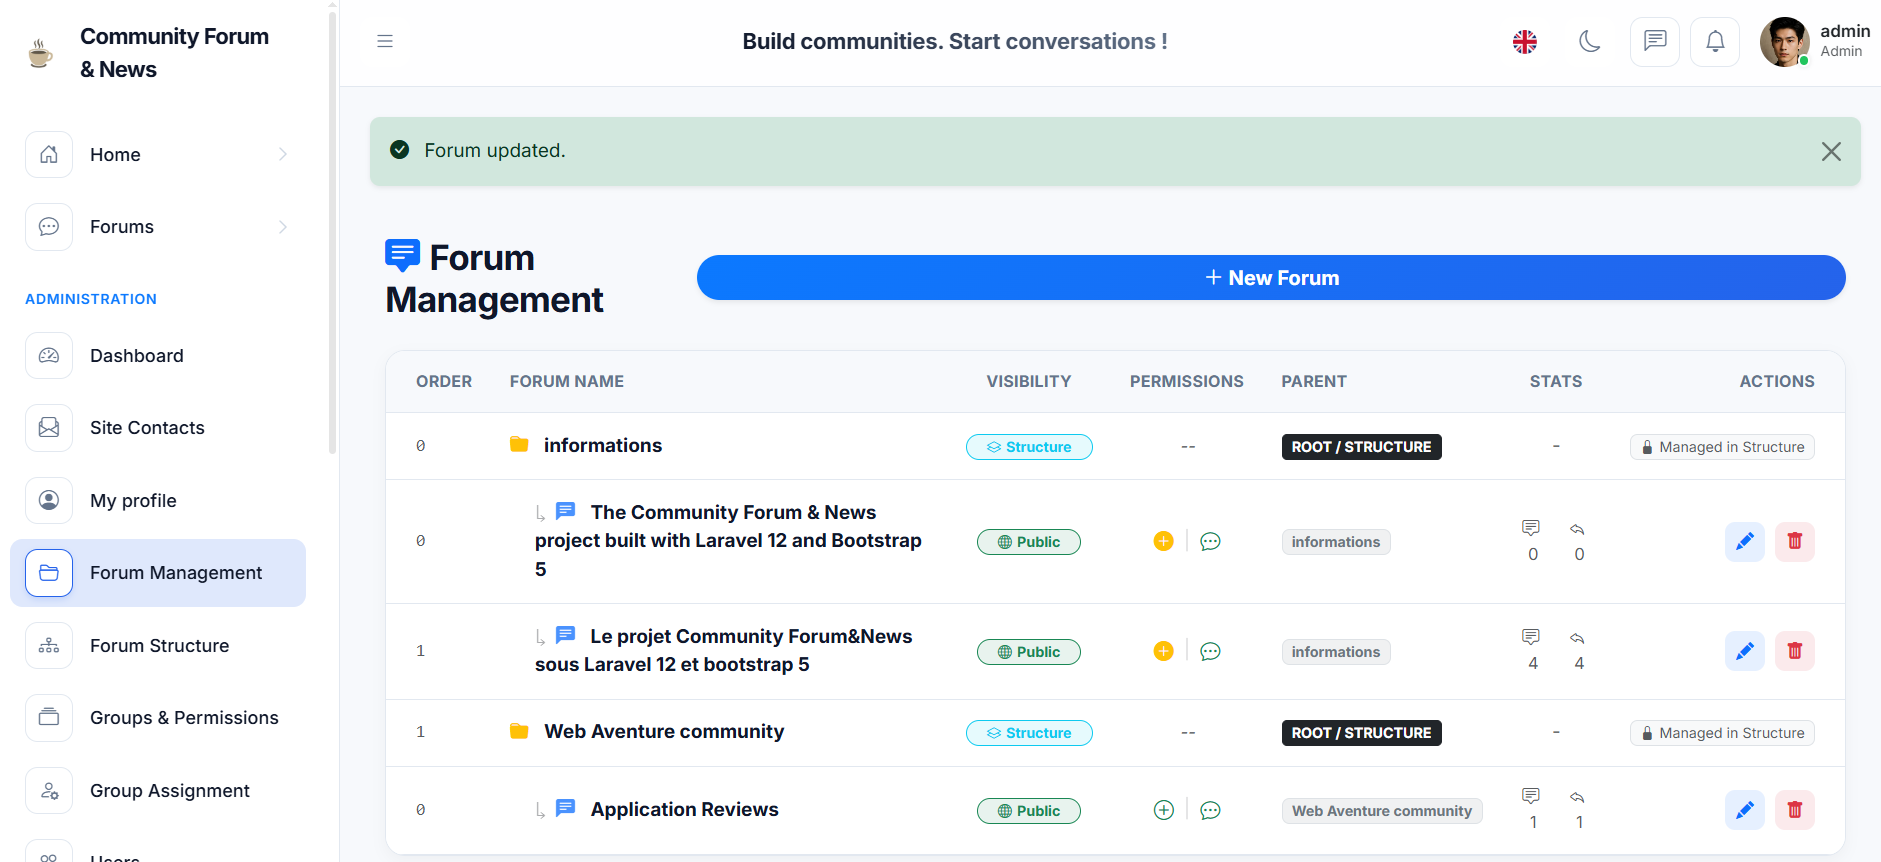
2. Forum Structure
Organize your community hierarchy with a clear, visual tree-view.
-
Forum Structure (Root): This is where you define your main architecture.
- Categories (Yellow Folder): These are containers (e.g., "General", "Gaming"). They hold forums but don't contain posts directly.
- Forums (Blue Bubble): These are the actual discussion areas where users post topics.
-
Forum Management: As seen in the screenshot above, this view gives you a quick overview of your community's health.
- Visual Icons: Quickly see permissions (Who can read/write).
- Stats: View post and topic counts per forum instantly.
- Quick Actions: Use the Edit (Pencil) or Delete (Trash) buttons to manage items on the fly.
!!! tip "How to reorder forums" To change the position of a category or a forum, simply edit the Order number. The system uses ascending order: 0 appears at the very top, while higher numbers appear lower down.
### Editing a Forum
Clicking the Edit (pencil icon) on any forum opens the detailed configuration panel. We designed this to be as simple as possible.
1. General Settings
Change the name, description, or move a forum to a different category instantly.
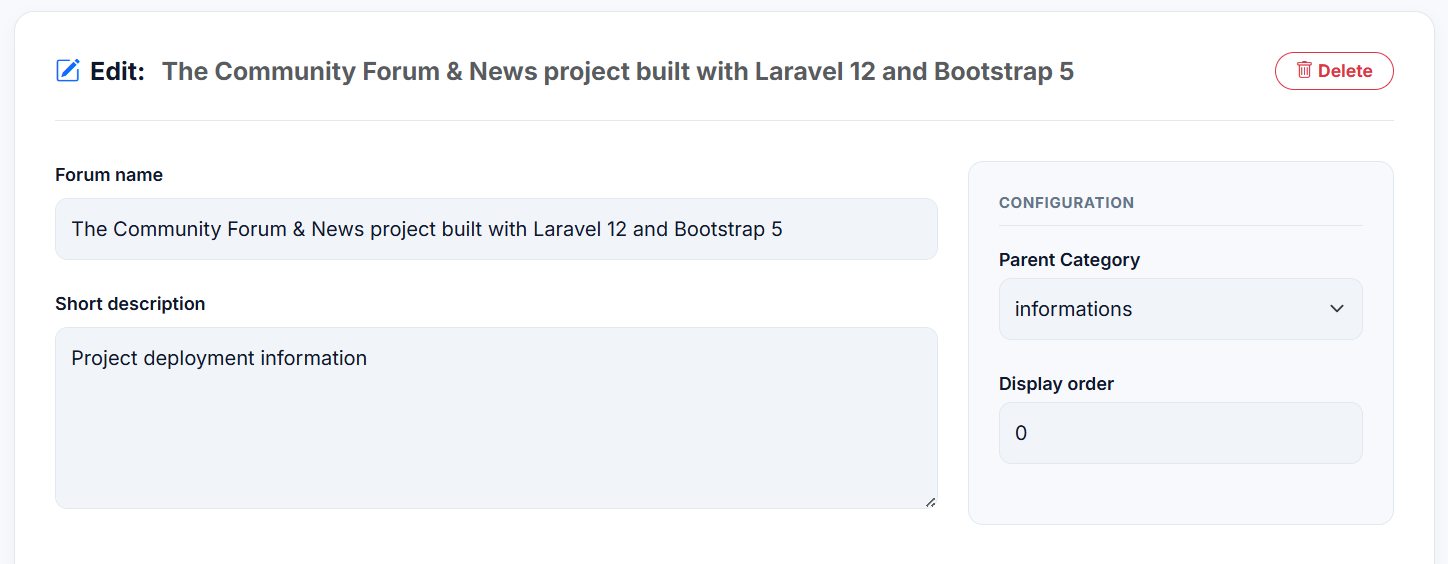
- Parent Category: Move a forum from one category to another simply by selecting it from the dropdown.
- Display Order: Adjust the number to sort forums (0 = Top).
2. Smart Permissions (ACL)
Forget complex permission grids. We use a "Check-to-Restrict" logic.
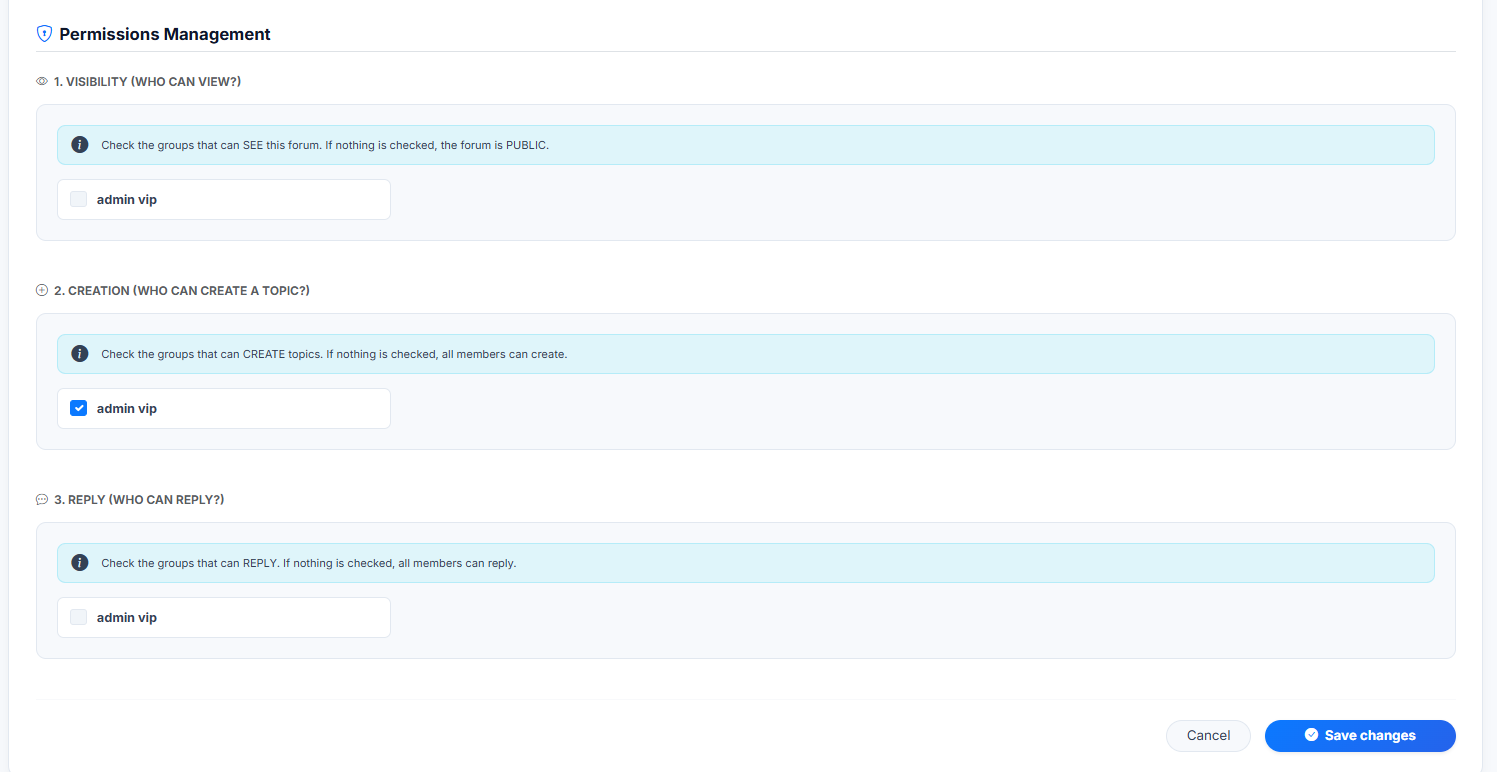
The system is divided into 3 levels of security: 1. Visibility: Who can see this forum? 2. Creation: Who can start a new topic? 3. Reply: Who can reply to existing topics?
!!! success "The 'Lazy' Logic" To make your life easier, if you uncheck all boxes, the forum becomes PUBLIC. You only need to check boxes if you want to restrict access to specific groups (e.g., creating a "VIP Area" or "Staff Only" section).
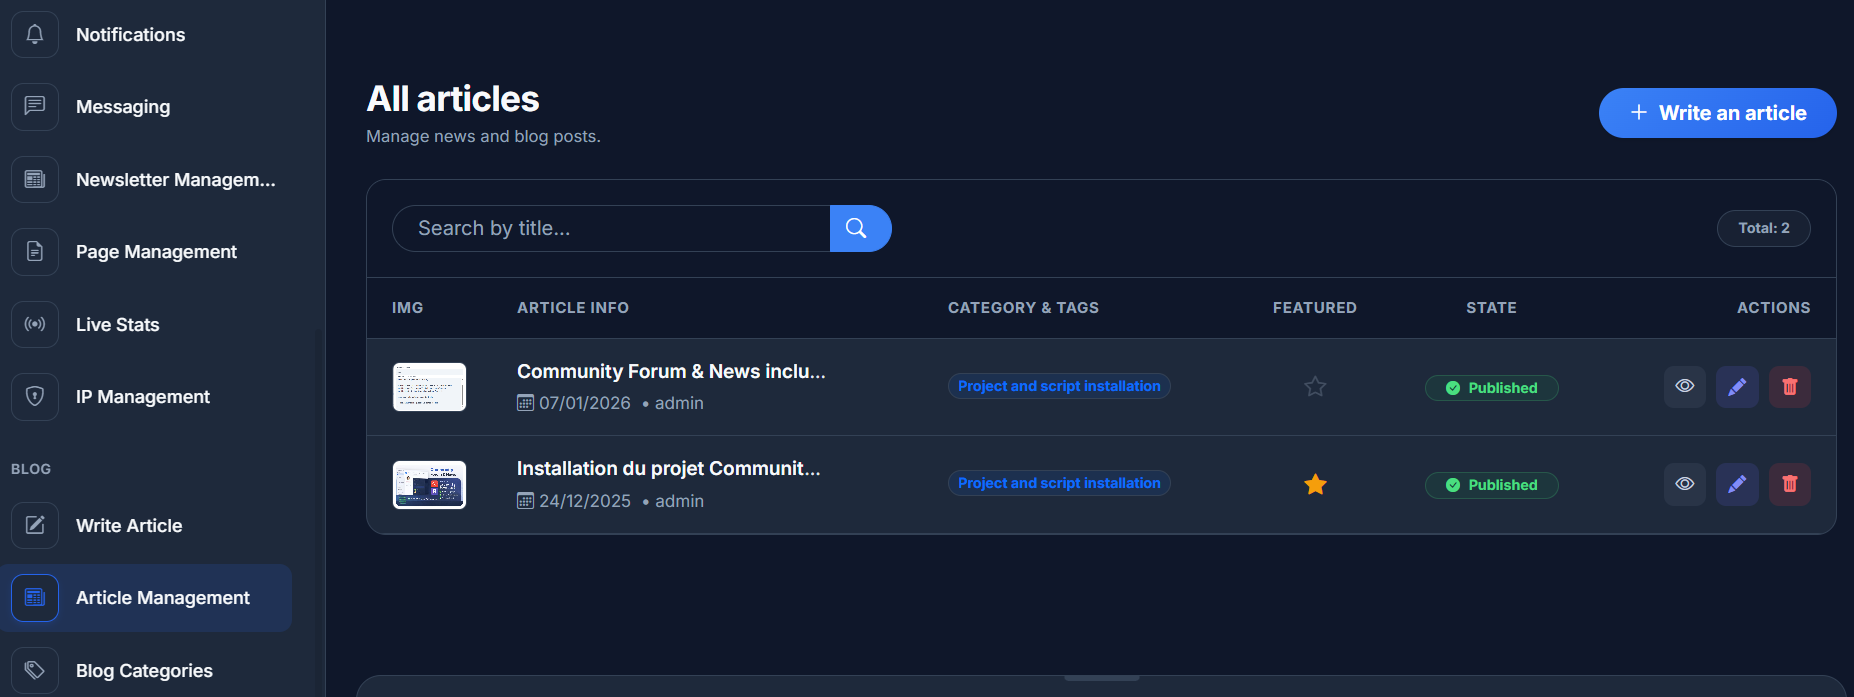
3. Blog & Content System
Use these menus to feed the "News/Magazine" layout of your homepage.
-
Blog Categories: Create topics for your articles (e.g., "Reviews", "Tutorials", "News").
-
Write Article: Opens the rich text editor (Summernote) to publish a new article. You can upload a cover image which will be displayed in the homepage slider.
-
Article Management: Edit, delete, or hide existing articles.
4. Communication Tools
Engage with your community.
-
Newsletter Management: Send an email blast to all registered users.
- Note: This relies on the SMTP settings configured in the Dashboard.
-
Site Contacts: View messages sent via the "Contact Us" form on the public footer.
-
Notifications & Messaging: Send internal system alerts or direct private messages (PM) to specific users directly from the admin panel.
5. Site Content
- Page Management: Create custom static pages (e.g., "Terms of Service", "Privacy Policy", "Legal Notice"). These will appear in the site footer menu. ---
6. Automating SEO (Optional)
For most users, this step is NOT necessary.
Since your Dashboard includes a "Generate XML" button in the SEO / Sitemap section, you can simply click it whenever you publish new content.
However, if you post dozens of articles every day and want to automate this process without logging in, you can set up a direct Server Cron Job.
How to set up an automatic update
- Log in to your hosting panel (e.g., cPanel).
- Go to Cron Jobs.
- Choose a frequency (e.g., "Once Per Day").
- Enter the following command to trigger the sitemap generator directly:
```bash /usr/local/bin/php /home/YOUR_USERNAME/public_html/core/artisan sitemap:generate >> /dev/null 2>&1